

Installation/Update
Basic Components
Section titled “Basic Components”We have these three components to install:
- Wollok-CLI (the language interpreter)
- IDE (Visual Studio Code)
- Extensions (developed for VSCode)
Wollok CLI
Section titled “Wollok CLI”The language interpreter is Wollok-CLI (Command Line Interface). It is the executable that runs Wollok programs. There are two ways to install it:
- Via Node (recommended for personal computers)
The recommended Integrated Development Environment (IDE) is Visual Studio Code (VSCode), as it has extensions that make learning to program with Wollok more enjoyable. However, the source code is simply text and can be edited with any editor.
Install VSCode.
Extensions
Section titled “Extensions”These instructions for installing and configuring Wollok extensions for VSC are independent of your machine’s operating system.
-
Open VSCode
-
Install the extensions
wollok-lsp-ideandwollok-highlightavailable in the links or directly from the VSCode Marketplace. The order in which you install the extensions doesn’t matter.
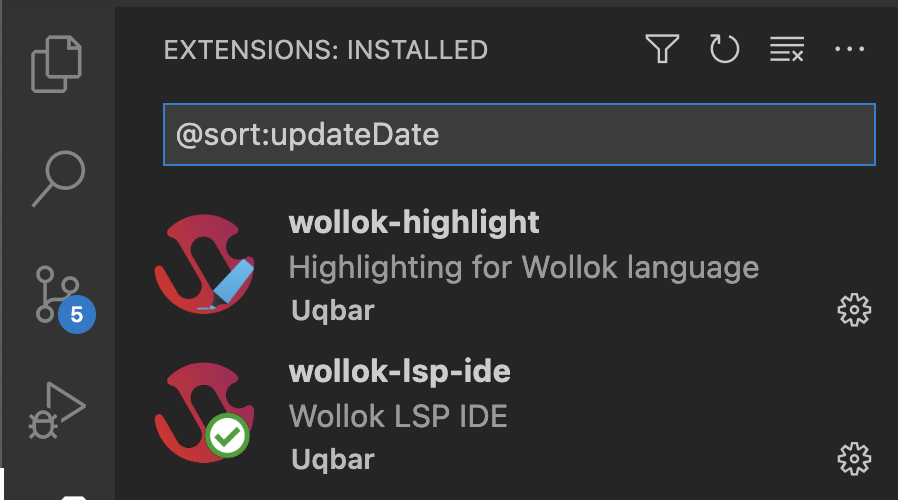
You can go to the Extensions tab, search for ‘wollok’ and install them as shown in this image:
- If everything went well, you should be able to see both extensions installed in your VSCode:
- Now you need to configure the extension so it can use Wollok-CLI to run programs.
-
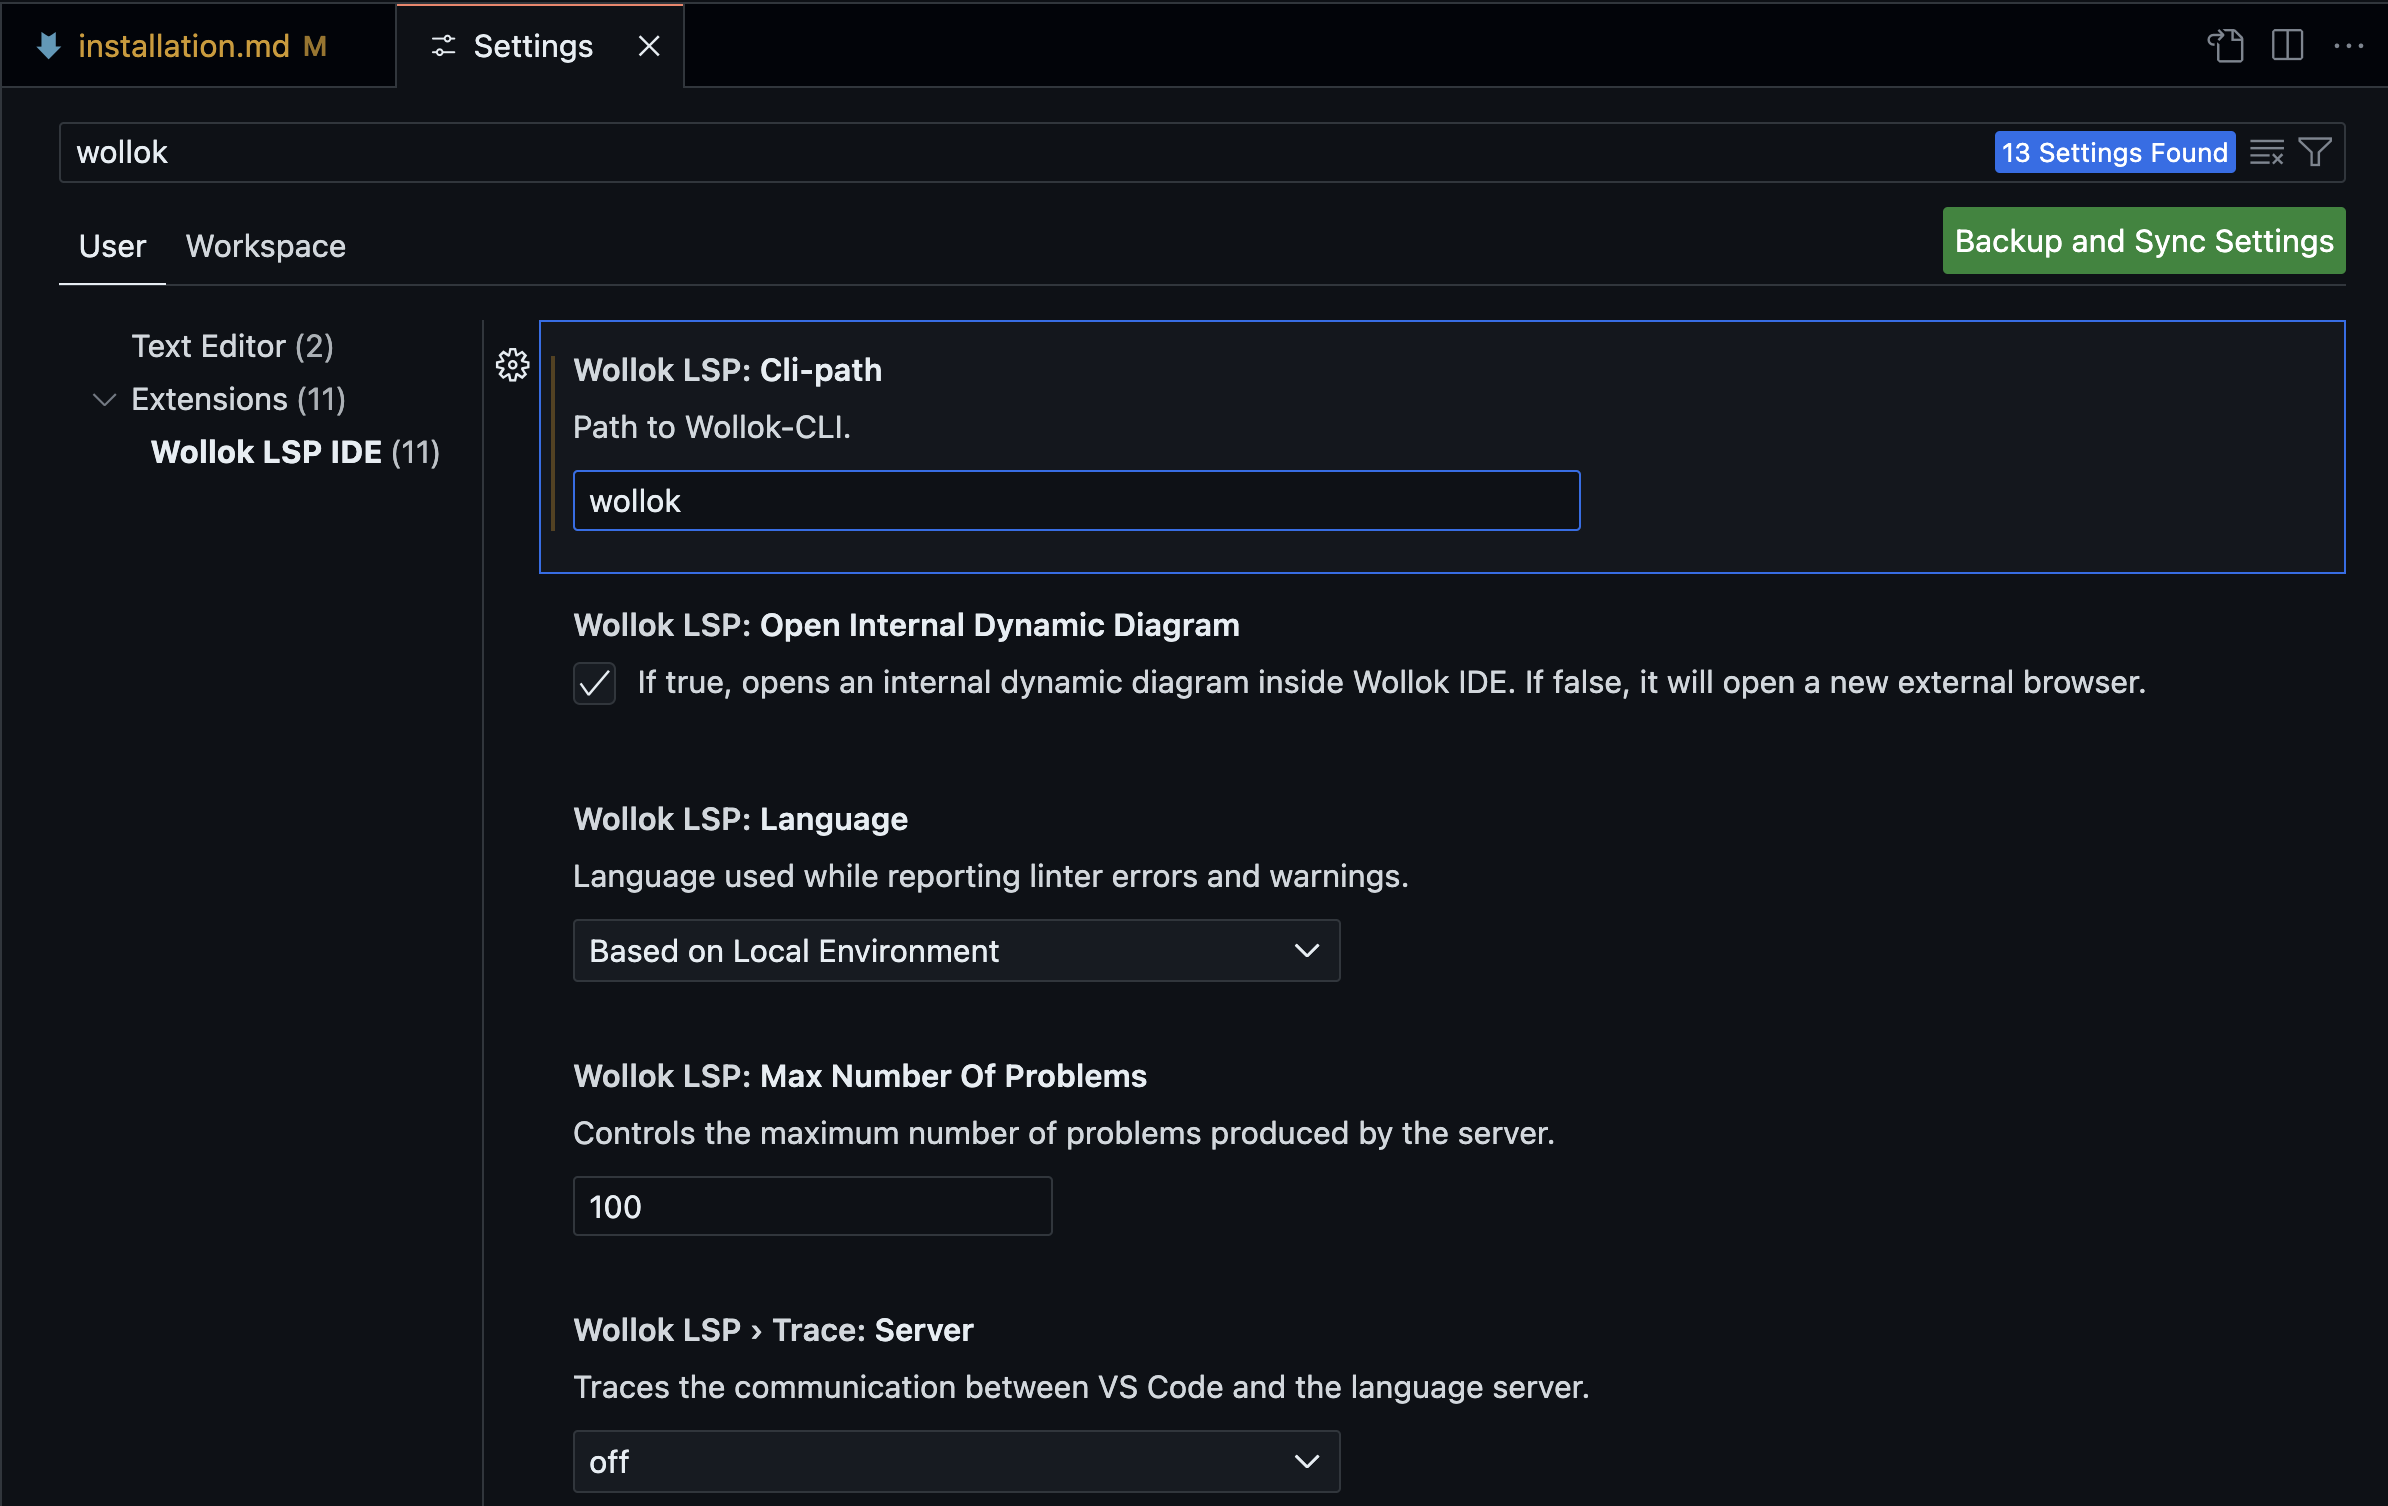
Go to the “settings” tab in VSCode:
Ctrl + ,or from the menu:Code -> Preferences -> Settings. And search forwollok. -
The first setting that will appear is to indicate the path where Wollok Command Line Interface (CLI) is located. For this, you need to enter in the field:
wollok. -
There are also other configurations, such as selecting the language in which you want error messages to be displayed.
-
At the end it should look something like this:
Done!
You should now be able to use VSCode with Wollok.
Tutorial Videos (in Spanish)
Section titled “Tutorial Videos (in Spanish)”Windows
Section titled “Windows”Next Steps
Section titled “Next Steps”What’s next?
- You can see how to create a Wollok project from scratch.
- You can download an example and try it out.
- If you already have a Wollok project in your VSCode, we recommend taking the Tour of the tools we support to get the most out of the IDE.
- If you have questions about the language, you can go to the documentation.